FAQ
General
Got a Question?
Select any of the links to the left!
General Questions
I don’t have the owners manual for my unit. Where can I get it?
All manuals and instruction sheets for our current and recent products are available for free download. You can save to your computer and/or print them out. If you want a hard copy, or you need a manual for an old product, please contact us.
How do I get my product serviced?
Vexilar, LLC. Attn. Service
6667 W Old Shakopee Road
Suite #101
Minneapolis, MN 55438
Learn more about the warranty here
When you send the unit in, please include a short note about the problem, your return address, and telephone or email. We can contact you if the repair looks to be expensive or if you request an estimate. Service time generally runs about 5 working days
Forgot my password. How do I reset my T-BOX back to factory Settings?
Resetting the T-BOX: When the system is ON, press the ON/OFF switch three times, quickly within 3 seconds. The system will then need to be turned off and then re-start. Now the name and password will be back to factory default: 12345678.
How do I contact an actual living breathing person at Vexilar, Inc.
At Vexilar, Customer service is critical to everyone who needs it. Click here for all contact options. We have plenty of humans, eager to help. Office hours are 8:00AM to 4:30 PM Monday -Friday
What is an FAQ?
It's a Frequently Asked Questions to help Vexilar owner's find the solution to commonly asked questions without having to call the factory.
SonarPhone Questions
I still cannot re-set my T-POD what do I do now?
1. With T-POD off (no light) power cable connected to power or USB port
2. Here is the tricky part... hold the T-OPD with the small groove on the bottom as shown in the attached photo. Now take the shorter re-set plug and try to slowly connect the plug.....right to left as the plug makes contact with the pins.. They tell me your goal is the be sure the pin on the right and the center pin touch almost a second before the left pin makes connection, so do it slowly! Once you have done this keep it connected for 10 seconds, then disconnect.
3. YOU MUST wait for the T-POD to power off again (light must go off)
4. Now wet connections to turn on T-POD and you should be good to go. Password will be 12345678
5. Before the app will run you will need to be sure to select "MASTER" and that password will again be 12345678
Forgot my password. How do I reset my T-BOX back to factory Settings?
Resetting the T-BOX: When the system is ON, press the ON/OFF switch three times, quickly within 3 seconds. The system will then need to be turned off and then re-start. Now the name and password will be back to factory default: 12345678.
How do I contact an actual living breathing person at Vexilar, Inc.
At Vexilar, Customer service is critical to everyone who needs it. Click here for all contact options. We have plenty of humans, eager to help. Office hours are 8:00AM to 4:30 PM Monday -Friday
Forgot my password…How do I re-set by T-POD back to factory Settings:
Resetting the T-BOX
When the system is ON, press the ON/OFF switch three times, quickly within 3 seconds. The system will power OFF if the reset was successful. Turn it on again. Now the name and password will be back to factory default: 12345678.
When do I need to re-set my SonarPhone back to factory settings?
Resetting your T-POD or T-BOX should not need to be done often, but it is recommended whenever you are having connection issues. Re-setting the password re-boots your Sonarphone WiFi transmitter and often clears it up any connection issues. Also, if you are find yourself not staying connected to WiFi, or cannot establish a connection or forgot your password… Often when you start using a new device it is best to do the re-set and start fresh.
For T-POD
When the system is ON, press the ON/OFF switch three times, quickly within 3 seconds. The system will power OFF if the reset was successful. Turn it on again. Now the name and password will be back to factory default: 12345678.
For T-BOX
When the system is ON, press the ON/OFF switch three times, quickly within 3 seconds. The system will power OFF if the reset was successful. Turn it on again. Now the name and password will be back to factory default: 12345678.
I cannot connect, Dropped signal or says no “WiFi internet connection”
This is a Samsung phone /tablet issue, go to WiFi settings and in advanced feature noted below:
• “Check for Internet service” - If present make sure this setting is unchecked. If this is checked the phone with try to verify if the access point has internet connectivity. Since the SonarPhone Wi-Fi does not have internet, it results in an error. Example device: Samsung S3, S4.
• “Auto network switch” - If present try disabling this setting. If this setting is enabled it will prompt the camera to automatically switch to a Wi-Fi network with an internet connection. Since the SonarPhone’s Wi-Fi does not have internet, it switches to a different Wi-Fi network. Example device: Samsung Note 3.
• “Smart Mode” - This should be turned OFF. When enabled the device drops SonarPhone App connections when within range of a more popular network such as a Home or Office network. Example device: Samsung Galaxy S4.
• “Avoid poor connection” - If present, make sure that this setting is checked. Example device: Nexus 5.
• “Auto connect” - This setting allows the phone to automatically connect to known Wi-Fi networks. If present, try disabling this. Example device: Samsung Galaxy S3.
• “Sprint Connections Optimizer” - This option is on Sprint phones only. If present, try turning this off. This setting forces an auto-connect to 4G, over-riding Wi-Fi in a small number of locations on the Sprint network. You can find this by going to Settings > More Settings > Mobile Networks > Connections Optimizer > Uncheck “Sprint Connections Optimizer”
Is my neoprene armband waterproof?
No it is not. It is a very well designed armband holder that is only water resistant. If you wish to protect your smart device from submersion we suggest you find a waterproof floating holder that meets your specific requirements.
How do I buy a SonarPhone locally or internationally?
Right on the Vexilar site is the easiest way to place your orders. SonarPhone
I can’t find the app in the Apple Store
Make sure you're not looking in Apps for iPads only, look for the app for iPhones, the program works in both systems and be sure you do search as one word: SonarPhone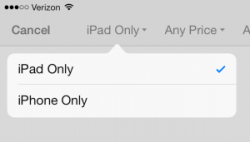
Will FishPhone and Sonarphone work on Kindle or Microsoft surface laptops?
Not at this time.
My tablet was set-up as a SLAVE unit, but does not show any signal.
With SonarPhone, the MASTER must be functioning for a SLAVE unit to also function. You will notice on the SLAVE display even the option for setting the MASTER is not available. To allow the second device to become the MASTER you will need go back to the main page and touch the “MASTER” button, then input the MASTER password to set your device as a MASTER and basically start over with your set-up. Only one system can be the MASTER at a time, while there is no limit to the number of SLAVE devices you have.
My SonarPhone keeps losing connection to my T-POD. Why could that be?
Go to WiFi settings and in advanced feature note below:
-
"Check for Internet service" - If present make sure this setting is unchecked. If this is checked the phone with try to verify if the access point has internet connectivity. Since the SonarPhone Wi-Fi does not have internet, it results in an error. Example device: Samsung S3, S4.
-
"Auto network switch" - If present try disabling this setting. If this setting is enabled it will prompt the camera to automatically switch to a Wi-Fi network with an internet connection. Since the SonarPhone’s Wi-Fi does not have internet, it switches to a different Wi-Fi network. Example device: Samsung Note 3.
"Mobile Data" setting on S3 phones should be shut off o "Smart Mode" - This should be turned OFF. When enabled the device drops SonarPhone App connections when within range of a more popular network such as a Home or Office network. Example device: Samsung Galaxy S4.
-
"Avoid poor connection" - If present, make sure that this setting is checked. Example device: Nexus 5.
-
"Auto connect" - This setting allows the phone to automatically connect to known Wi-Fi networks. If present, try disabling this. Example device: Samsung Galaxy S3.
-
"Sprint Connections Optimizer" - This option is on Sprint phones only. If present, try turning this off. This setting forces an auto-connect to 4G, over-riding Wi-Fi in a small number of locations on the Sprint network. You can find this by going to Settings > More Settings > Mobile Networks > Connections Optimizer > Uncheck "Sprint Connections Optimizer".
How do I prevent losing my T-POD when casting?
You do not want your line to break when casting your T-POD, so be sure to use a heavy braided line, at least 10 lb test. Tie this to a medium size snap and clip this to the T-POD's nose ring. Make sure you use the correct knot for the line you are using. The Palomar knot is best for most braids. Also, the fishing pole you use should be heavy enough to support the weight of the T-POD without too much bending.
When sharing a friends sonar signal, why don’t I have control of some of the menu functions?
Yes. SonarPhone relies on a Master/Slave controller system. There can only be one Master, but an unlimited number of Slave viewers. To prevent the secondary or Slave user from interfering with the Master user, some menu functions are disabled.
Why do only some of my menu functions work in the simulator mode?
Some menu functions can only work if the system is actually receiving a sonar signal.
What will Vexilar do if I damage my T-POD?
SonarPhone engineers have worked hard to make the T-POD and T-BOXes out of the most durable materials possible, but sometimes events occur no one has control over. T-POD No Hassle Service/Warranty Program Your SonarPhone T-Pod has a one year warranty from date of purchase, but we know fishing can be hard on equipment. So if you damage your T-POD (and this is NOT covered by your warranty), you can have it replaced for roughly half of the original cost. This option also extends beyond the standard warranty period. So if five years from now the battery fails, Vexilar’s No Hassle Service Program for SonarPhone T-POD owners will be there for you for as long as you own the product! This offer DOES NOT extend to the SonarPhone T-BOX systems – Sorry. Here’s how it works: Send us your damaged or destroyed SonarPhone T-POD along with $60.00 US, and we will send you back a replacement T-POD! No questions asked. This cost includes domestic return shipping. Some additional shipping may apply for customers outside the USA. Credit card payment is also accepted by phone. (Visa and Master Card only). Note the replacement DOES NOT include charging cables, Adaptors, Neoprene armband or any other special offers. It is the T-POD only that will be replaced, part #SP100A. More details available in your on-line Owners Manual.
If I dropped my T-POD, will it still work?
The internal components of the T-POD are designed to be impact resistant. Vexilar's extensive weather chamber, vibration and stress testing of each T-POD will protect your system from failure under normal use. If you notice the T-POD being cracked, from impact, DO NOT put into water as water contamination will shut system down. A cracked system is NOT covered by your warranty. We recommend you use a silicone glue to seal the crack before using it again.
Can I open my T-POD or T-BOX?
No the system is sealed, so there is no way to get into your T-POD . If you think your T-POD or T-BOX is not working correctly, please visit the Mobile App support page.
How many re-charges should I expect out of my T-POD?
The Lithium Ion battery technology used in the T-POD comes from camera technology and you should expect 500 complete recycle charges and much more if you do not allow the battery to be completely drained before re-charging. Charge the battery often and you will have good battery life for years!
Will my T-POD work in Salt water?
All SonarPhone systems are designed for saltwater use with the best stainless components possible. However, rust and electrolysis can still occur, especially if charging while still damp, so please wash your T-POD in fresh water after each use and dry completely before attempting to re-charge.
My Charging terminals are getting rusty!
This is due to electrolysis talking place if the terminals are not dry when you start the re-charging process. We recommend you use a cue tip and WD-40 to dry the terminals keep the terminals free from rust. This will help prevent any rust from developing.
Can I Over charge my T-POD?
No you cannot. You can either use your USB port on your computer to charge your T-POD or use the supplied AC 110200 volt adapter. Expect it to take about an hour to re-charge a fully drained T-POD battery.
My T-POD is randomly flashing in the water, is that normal?
This is telling you the T-POD is transmitting! The lights inside the T-POD are a helpful tool to let you know what is going on with your system. Light-on-steady means the system is on but not transmitting. A random blinking light means the system is transmitting a WiFi signal. When Charging the light inside will be red and signifies you are in charging mode. It then goes to green when the charge cycle is complete.
How do I turn my T-POD off after I am done using it?
Its automatic! The T-POD is water activated and when removed from the water, the system remains transmitting for 30 seconds before it shuts down.
My T-BOX on-off switch is flickering? Is that normal?
Yes it is. When the system turns on the light will be steady, but as it starts transmitting the light will ALWAYS be flickering to confirm the T-BOX is transmitting.
My system loses WiFi and just goes back to my icons
This is another setting option you need to adjust under the WiFi controls. You need to Auto-Connect or Always connect to the selected WiFi signal, since you will from time to time have a break in your WiFi transmission, you do not want to get kicked out. When this occurs your only option is to re-enter the system, AFTER you adjust your WiFi settings.
Why can’t I see my display in bright sunlight?
All Smart devices have a display brightness control, go to your settings and set brightness control of auto to manual to pump up the brightness.
My SonarPhone goes to sleep after a few minutes.
You need to go to settings and adjust the sleep mode to a longer period or never to prevent your system from going to system lock or sleep mode.
My SonarPhone only shows a simulation.
You need to go into the menu setting of SonarPhone and disable your simulator mode setting
Will my smart phone or tablet be able to run SonarPhone App?
In most cases it will! But you need to have an Android system 2.0 or newer or Apple iOS 4.3 iPhone 4 & Up / iPad, iPad2, iPad Mini.
How do I reset my T-Pod?
1) The T-pod must be OFF (Not glowing green) and FULLY CHARGED before resetting;
2) Using the shorter (reset) lead on power charging cable you will need to connect to power then connected to your T-POD for at least 10 seconds
3) Remove the lead from the T-pod, DO NOT CONNECT THE DEVICE (SMARTPHONE) TO THE T-POD immediately. Allow the T-pod turn off automatically in one minute;
Factory Password code is 12345678
If the device does not accept the factory default password please re-peat steps A – B & C (It may take several attempts in some cases.)
Don’t forget to re-establish yourself or device as the Master before you enter the SonarPhone app.
Master Password:12345678
After I add my WiFi password 123445678 my Samsung S3 and S4 phones tell me “No Internet Connection” what is going on?
Go to your WiFi advanced settings and remove your selection for WiFi Internet connection. Your phone was set to only look for WiFi that delivers an internet connection.
Underwater Camera Questions
What about fogging or a cloudy monitor display?
Water contamination in your camera housing will often appear as a foggy or cloudy display. Don't confuse this with dirty water. Above the water, the monitor display will always be foggy or cloudy. When this happens all the time, then you know you have water contamination. This is NOT repairable and must be replaced. This IS a warranty issue for the first two years of purchase, after that, you will need to purchase a replacement camera. For service or warranty return back to the factory ONLY the camera and Cable for replacement (along with proof of purchase of course if it is under warranty).
My camera is leaking! Why is this happening?
Don't worry! Your camera is not leaking, it is the water coming from inside the protective shell that surrounds your actual camera housing. The Vexilar camera housing is designed to allow water to flow inside the protective housing to give you better balance in the water with less weight. This is normal to see a trail of water come from the camera when you remove it from the water.
I would like to mount my Fish Scout in my boat, do you have a bracket for it?
Great idea for sure and it works great in open water. Vexilar does offer an Open water kit option for the camera systems that consists of a sun hood, mounting bracket, Vexilar Quick Release mount and wire harness. Check it out on-line under Vexilar accessories. Kindle or Microsoft surface laptops?
FLX-28 Questions
Are the power cords interchangeable from unit to unit?
No. The FL-8s and FL-18s use the same rectangular power cord and the FL-12, FL-20, FL-22, and FLX-28 all use the same round power cord.
Will my transducer from my old Vexilar flasher work on my new FLX-28?
Yes. All Vexilar flasher transducers are interchangeable no matter what year they were made.
Does the FLX-28 have interference rejection like my other Vexilars?
The FLX-28 now has 20 interference rejection settings to choose from. Our older models have 10 interference rejection settings.
How do I change my FLX-28 from meters to feet?
First you need to get 14 volts to the unit. One way to do this is to plug the unit in to a charger and catch it right before the charger light turns from red to green. At this point you can do the same procedure that you would do to go into “Weed Mode”. Turn the unit off, set the gain at “0”, select “Normal” on your mode switch, and turn your unit on while holding in the gain button.
What improvements does the FLX-28 have over the FL-20?
The FLX-28 is now brushless. It also is the first auto ranging flasher ever made. It has five color palettes to choose from that uses even brighter LED’s for better viewing in direct sunlight. The FLX-28 has a weed mode and even has a digital depth indicator along with LED depth markers.
I like using Auto Zoom but my signal is too strong.
You can use Auto Zoom and Low Power at the same time. To do this turn your unit off, put the gain at “0”, set the mode switch to “LP”, and turn your unit on while holding in the gain button. The unit will briefly say “Low Power” when you first turn it on. Now all mode functions are in Low Power. Simply turn the unit off and back on to go back to normal.
The signal strength is a lot stronger than on my other Vexilars.
Most of this sensitivity is coming from the Proview Iceducer. Switch your unit to “Low Power” mode to reduce the sensitivity.
I thought the FLX-28 was silent with the new brushless design?
The brushless design does make the FLX-28 quieter than other units, however, there is still a motor spinning the light wheel at 2500rpms.
Why does my FLX-28 jump to 300ft while I’m hole hoping in Auto Range?
Any time you move the transducer you are changing the depth. The unit will default into the 300ft range while recalibrating the depth. This can also happen if you have a weak signal or don’t have the transducer below the bottom of the ice.
How do I know when my battery is getting low?
At 10.5 volts “Low Battery” will appear on your display. It’s always a good idea to keep your battery at full charge as much as possible to increase its lifespan. At 12 volts your battery is actually at about 50-60%.
FLX-20 Questions
Are the power cords interchangeable from unit to unit?
No. Only the FL-8s and FL-18s are interchangeable. The FL-12 and FL-20's use the same power cord, but will NOT work with the FL-8s or the FL-18s.
Will my old transducer from my FL-8 or FL-18 work with my FL-12 or FL-20?
Yes, all transducers are fully interchangeable between the FL-8s, FL-18, FL-12 and FL-20's.
What improvements does the FL-20 have over the FL-18?
The FL-20 has a flat screen that delivers a larger display that won't trap in rain or snow and increases the viewing angle by 50%. It has two auto zoom ranges that split the screen to let you focus on the bottom 6 or 12 feet of the water column. It also has a night mode that allows you to cut the output of the LED display by 50% to avoid getting night blindness. The FL-20 also has a built-in low battery indicator. But note, teh FL20 DOES NOT have a BL or Bottom Lock option for open water use.
Does the FL-20 have Interference Rejection like the FL-18?
Yes, it's virtually identical. There are ten IR settings controlled by pressing in on the Gain control.
FL-18 Questions
Can the FL-18 be converted to a Deep Range like the SE?
Yes, and no. If your unit is newer than a 2010 model of the FL18, it cannot be changed. IF it is older than 2010, then the last range would change from 200 feet to 300 feet. This custom conversion needs to be done by our service department.
Does the FL-18 have Interference Rejection like the FL-8SE?
Yes, although the control is slightly different. There are ten IR settings controlled by pressing in on the Gain control.
Will my old FL-8 transducer work with the FL-18?
Yes, all transducer and accessories are fully interchangeable between the FL-8s and the FL-18.
What improvements does the FL-18 have over the FL-8?
There are three main improvements over the FL-8. First is the split-screen zoom, second is the Low Power Mode, and third are the much brighter display lights.
FLX-12 Questions
What improvements does the FL-12 have over the FL-8SE?
The FL-12 has a flat screen that delivers a larger display that won't trap in rain or snow and increases the viewing angle by 50%. A new enhanced receiver gives you cleaner signals and less noise.
Does the FL-12 have Interference Rejection like the FL-8SE?
Yes, it's virtually identical. There are ten IR settings controlled by pressing on the I.R. button.
FL-8 SE Questions
A competitor boasts a higher watt unit. I’ve been told to go for the wattage. What should I do?
Power output is only one of the factors in the operation of a depth finder. It measure how much "punch" a sonar transmitter has. Other sonar specifications, such as receiver sensitivity, sonar resolution, and display resolution have just as big of an effect on the overall performance of the unit.
I’m Color-Blind. Can you help me?
Yes, we do offer a service fix for you. By changing the green color to a blue, most color-blind people can recognize the difference between the colors. Units that can be converted are: FL-8SLT, FL-8SE, FL-12, FL-18 and FL-20. Learn all about this service update here.
Does the FL-8 SE work as good on the boat as the ice?
Yes, but differently. On the open water it is difficult to see your bait because the motion of the boat. On the open water you use the unit to see structure, quick depth changes, and fish. We recommend that you mount the flasher next to your LCD graph. You will be amazed at what you've been missing.
What is the smallest ounce bait I should be able to see on the FL-8 SE?
It is not so much the weight of the target, but the visible surface area of the bait that the unit sees from above. The more horizontal surface area the larger the target will appear on the display.
I have an FL-8 SE standard range unit, but would like the deeper unit. What can I do?
Send the unit in to our service shop. We can convert it to the other model for a nominal charge.
Can I have my older FL-8 or FL-8 SLT upgraded to an FL-8 SE?
No it cannot. Well, not cheaply anyway. The differences in circuitry between the older FL-8s and the SE version are too great to make upgrades available. The cost would approach that of a new unit.
How do you read the correct depth on the FL-8 SE?
The range control setting tells you how to interpret the depth displayed on the screen. The S numbers are white. This tells you to look at the white numbers on the outside of the depth scale. The D numbers are yellow. For these settings, you look at the yellow numbers on the inside of the display. A setting of S-1 would tell you to read the white numbers on the display as your depth. If the range control is set on S-2. This tells you to look at the white numbers and multiply the reading by two. Therefore, a bottom indication at 12 feet, on the display, needs to be doubled to get the actual depth of 24 feet. If the range setting was S-4, you would read the depth as 48 feet. The same method holds true for the D settings, only you read the yellow numbers on the depth scale. Still confused? Download the Owner's Manual or watch an instructional video.
FL-8 Questions
How long can I expect my FL-8 to last?
All of the FL series flashers are incredibly durable. The case, switches, and electronics will last for many years. The motor and display brush assembly, however, have a limited life time. You can expect to replace these two items every 5 to 7 years, if you use the unit a lot.
Tip - Get the brushes replaced before they wear down too far, it may save your motor and some repair cost. We even have a Brush Replacement Kit for the do-it-yourselfer.
I have a SiTex, Micronar, or Hondex FL-8. Is that your product too?
Vexilar was not involved with the FL-8 before 1990. Any product manufactured under the other names was not made by us, nor did we "buy out" those manufacturers. We can, however, provide parts and service for all of the older FL-8 models.
How can I make my FL-8 look brighter?
Often, the older FL-8 units get an accumulation of "brush dust" on the interior of the unit. This tends to affect the display, slowly, over a period of time. A good cleaning, and possibly a new brush assembly, is in order. You may be able to perform this service yourself. Click here for detailed instructions on how to do so.
Can my older FL-8 be upgraded so it will have the new feature of the SE?
No it cannot. Well, not cheaply anyway. The differences in circuitry between the FL-8 and the SE version are too great to make upgrades available. The cost would approach that of a new unit.
FL Accessory Questions
Will the S-Cable help get rid of my interference?
No, it will only make any interference problems worse. The S-Cable is for shallow water use.
Will the Sun Hood fit over the Mag Shield?
Yes, the Sun Hood fits right over the Mag Shield.
Does the Mag Shield help you see the FL-8 in the sunlight?
No, the Mag Shield is designed to magnify the screen and shield the display from debris falling in.
Transducer Questions
My AlumaDucer is not working as I expected. What should I do?
Please see the special FAQ's for the AlumaDucer here.
How can I test to see if my transducer is bad?
Try this test: Hold the transducer about 24" above a hard floor. There must be a flat solid floor below, no carpet. Place a hard cover book on the carpet if you need to. If it's an Ice-Ducer style, hold it by the cable. If it's a Puck or High-Speed, butt the top side up against the underside of a table. This is to insure that the transducer will point straight at the floor. Now, turn the flasher on to the first range. With the Gain set to zero, you should see a mark at the 12:00 position indicating the top, or your transducer, and another mark at the 9 foot line indicating the bottom, or floor
Notice how the depth is completely inaccurate. The reason is that the speed of the burst of sound coming out of your transducer is traveling much slower in the air than it would be in the water. So the unit thinks it's deeper. Also the strength of your system is much weaker in air than water. The top line should be mostly red in color. The bottom line may be green, orange, or red (depending on the strength of your system, how straight your transducer is, and the type of floor). If you cannot see the floor mark without having to turn your gain up, try a harder or smoother type of floor. If there is no change, the system has a sensitivity problem. You must see at least a green mark, on a hard floor, with the gain at minimum to pass the test
You can judge the overall sensitivity of the system by doing this "air demo" test, but you can't tell if a weakness is due to the unit or transducer (which is much more common) without replacing one or the other with a known good component. Borrow a friend's transducer or bring your setup into your local Vexilar dealer and ask if you can use one they have in stock for your test.
If your system passes the test, but you are still experiencing trouble seeing your bait out on the ice, clean the transducer face with hot water and a common dish washing detergent. Also, be sure you wet the transducer by rubbing water into the face of it before you start to fish. This insures good acoustical contact with the water.
If your transducer doesn't pass the test, it will have to be replaced. Weak transducers cannot be repaired. The dealer should be happy to help you out. If the flasher itself proves to be the culprit, our service department should be able to solve your problem.
Do transducers go bad?
On average, transducers fail more often than the sonar units they are connected to. The biggest "killer" of transducers is impact damage. This is usually evident by severe scratches or dents in the plastic housing.
Can I shorten or lengthen my transducer cable?
Yes, shortening involves removing the connector, cutting off some length, and then re-soldering the connector back on. Lengthening involves adding extensions. Changing the length won't affect performance noticeably, unless you extend the cable beyond 50 feet or so.
Will the Ice-Ducer work on my older Vexilar, or other brand, FL-8?
Yes. All of the FL Series transducers are compatible with the older versions of the unit. The Ice-Ducer will also work on many other bands of sonar. If the unit is 200 kHz and the proper connector is available we can set you up. Contact service for details. How do I buy a SonarPhone or FishPhone local or Internationally?
Are all of the FL Series transducers interchangeable?
Yes, all of the transducers sold with or as accessories to any of the current FL series flashers will work with any other FL unit, even the older non-Vexilar units. Click here for all of the options.
Purchasing Questions
What if I want something that’s not listed?
Ask your dealer if you can "special order" it. Or, contact us by email. We can help you find out if it's available, and where.
Why are your prices higher than my local dealers prices?
Because we want to encourage you to buy from your local tackle or sporting goods dealer. They are an important part of the system.
Can I order direct from the factory?
Yes, you can contact us directly or order using our secure online ordering system. Just click on the "Purchase" tab located on any of the product or accessory pages.
Battery and Charging Questions
What is Vexilar’s Warranty on Ice Fishing Batteries?
The battery warranty is covered under a pro-rated performance guarantee. Failure to properly care for battery is not the responsibility of Vexilar. Here are the details of the battery coverage from Date of Purchase (Proof of purchase will be required):
Vexilar Two-Year Extended Limited Warranty
Less than 30 days from purchase date - Full replacement.
Purchased 31 days to 2 years: Prorated
Over two years - No warranty - Options for new batteries.
My Ultra Pack Battery won’t charge, what should I do?
Be sure to turn the Master Power Switch to the ON (|) position. This switch effectively disconnects the battery from everything else. If you charge with the switch off, the Battery Status Indicator will light up, but the battery won't get charged.
Does my Vexilar Battery have a memory?
No. It is best to get in the habit of charging the battery after every use. The "fuller" you keep the battery, the longer it will last you. That's both in hours and years.
How long should I charge my battery?
If it is a Vexilar charger, charge until the indicator light tells you the battery is full. If not, you will need to find a way to measure the battery voltage. Generally, the charge should reach at least 14.5 volts, but not be allowed to go beyond 15 volts (measured while charging). A voltage meter can tell you this.
FLX-30 Questions
Questions?
No. The FL-8s and FL-18s use the same rectangular power cord and the FL-12, FL-20, FL-22, FLX-28, and FLX-30 all use the same round power cord.
Will my transducer from my old Vexilar flasher work on my new FLX-30?
Yes. All Vexilar flasher transducers are interchangeable no matter what year they were made.
Vexilar, LLC.

Contact Us
6667 West Old Shakopee Rd, Suite 101
Minneapolis, MN 55438
copyright © 2025 - vexilar.com - All Rights Reserved privacy policy